One can learn from damage.

We determine the cause of your case of damage for you and derive remedial measures from the knowledge gained in order to prevent future failure events. We characterize failure caused by fatigue, overload, corrosion, wear as well as mechanical and thermal stress, primarily on metallic components.
CAUTION // Please never puzzle broken surfaces back together. This can destroy fracture characteristics, making it more difficult to determine the cause of the failure. Call us and we will tell you how to proceed.
If you need a competent materials expert to investigate your case of failure or manufacturing defect, or if you want to check the quality of your components, we are the right peopleto help you. We convince through fast response times, detailed consultations as well as a routine and at the same time flexible approach.
Typical procedure of a failure analysis in our laboratory
In accordance with VDI Guideline 3822, we proceed as follows for a failure analysis:
Problem
You approach us with your problem. You should provide us with as much information as possible so that we can get an precise insight into the situation. This includes:
- Technical drawings, photos, sketches
- Delivery conditions, factory specifications, heat treatment specifications, etc. (valid at the time of delivery of the material)
- Information on material, production, heat treatment, field of application, operating conditions and time flow of the failure
Sometimes a a comparison between good and bad parts may also be useful.
Hypothesis, planning and offer
On the basis of the submitted data we will develop a failure hypothesis and submit you an offer for the possible investigation steps.
Carrying out the examinations
As soon as we have received a confirmation from you as well as the sample(s), we will start the investigation. If necessary, the examination plan will be flexibly adjusted due to new findings, of course only in consultation with you. In more complex cases, we will keep you informed with interim reports.
Results and documentation
Based on the results of the examination, we will send you a detailed report on the cause of the failure and remedial measures in English. Of course, we will be at your disposal afterwards for any questions you may have. The sample residues can be returned to you or disposed of as you wish.
Possible examination methods
- Destructive material testing methods (hardness measurement, tensile test, notched bar impact test)
- Non-destructive material testing methods (dye penetrant testing, nanohardness testing, grinding burn test)
- Metallography (light microscopy, determination of CHD and NHD, grain size determination, target preparations)
- Scanning electron microscopy (including EDX analysis)
- Chemical analyses (X-ray fluorescence and spark spectral analysis)
- Residual stress measurement and determination of residual austenite content
- Corrosion tests (e.g. testing the dezincification resistance of brass)
Application example: fatigue fracture

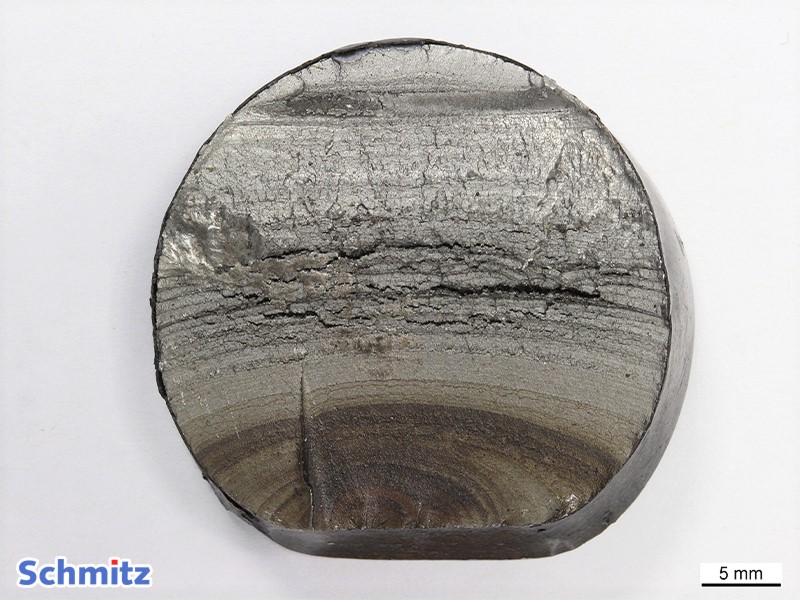
In the case of this broken hitch, the fracture mechanism could already be identified macroscopically: Fatigue fracture caused by bending on one side. There were chafe marks at the crack starting point, which could have been caused by an incorrectly hooked steel cable, for example.
Application example: dezincification

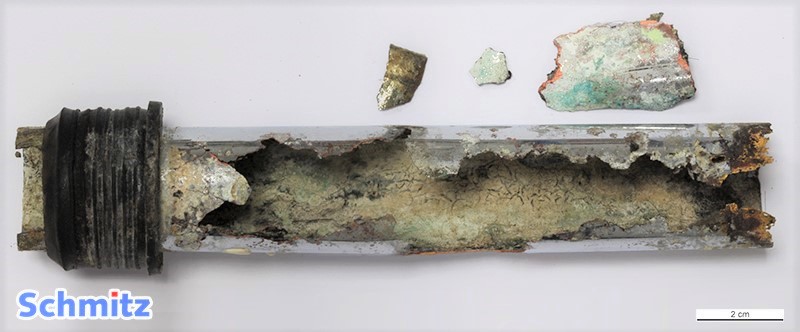
This brass tube literally crumbled during removal. Metallographic microsection revealed massive dezincification; in many places, the entire wall thickness consisted only of copper sponge and corrosion product.
Application example: Hydrogen embrittlement

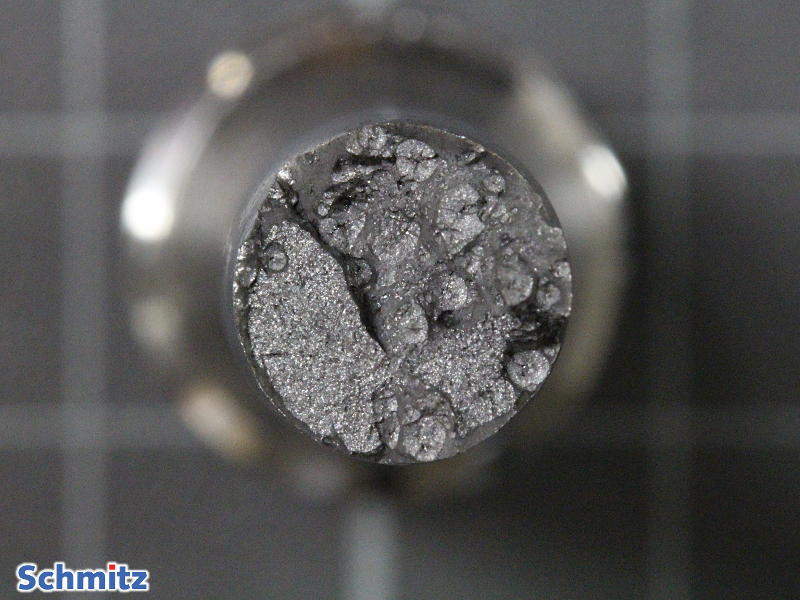
This fracture surface was characterized using light and scanning electron microscopy. The SEM showed a fisheye, which is typical for hydrogen embrittlement in steels and forms as soon as the material is loaded beyond its yield point.

