Metallography is used to describe the microstructure of metallic and non-metallic materials. This allows conclusions to be drawn about the manufacturing process, heat treatment condition, impurities, operating conditions, corrosion attacks or coatings. Heat treatment or casting defects can thus be identified and prevented in the future.
Metallographic examinations are one of our passions. With our many years of experience, we are happy to take on the most difficult preparation challenges. Tricky target preparations are no problem for us, e.g. into the smallest, corroded wall breakthroughs. We are also very flexible when it comes to the range of materials: no matter whether it is a composite material system, from aluminum to zinc, single Inconel chips or magnesium. We rise to any challenge.
If you experience capacity bottlenecks due to a high volume of samples, we will be happy to assist you even at short notice.
Application example: Microstructure of a nodular graphite casting
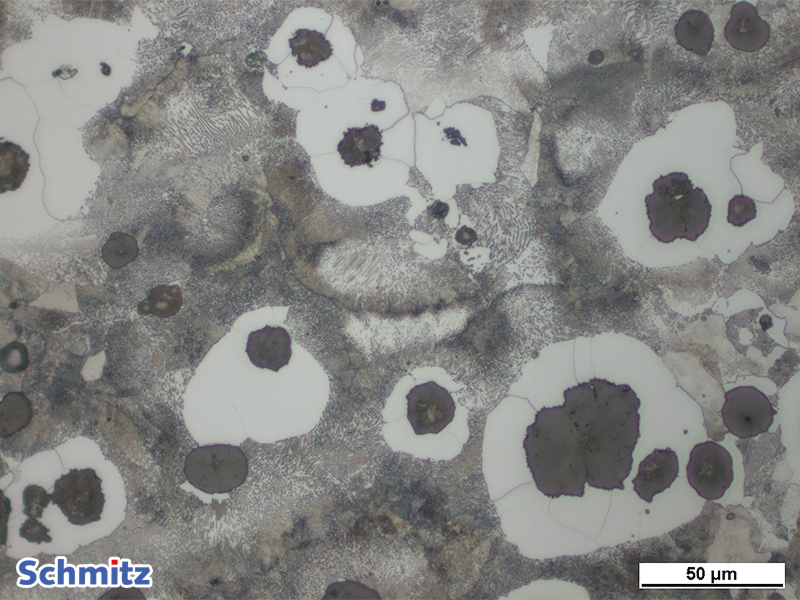
Micrograph of a nodular graphite cast iron microstructure.
Cast iron, unlike most steels, is not standardized according to chemical composition but according to the graphite formation as well as the minimum tensile strength and elongation at break or the hardness.
To characterize your casted samples, we perform tensile tests, graphite classifications according to DIN EN ISO 945, hardness tests or notched bar impact tests.
Application example: Identification of a heat treatment defect
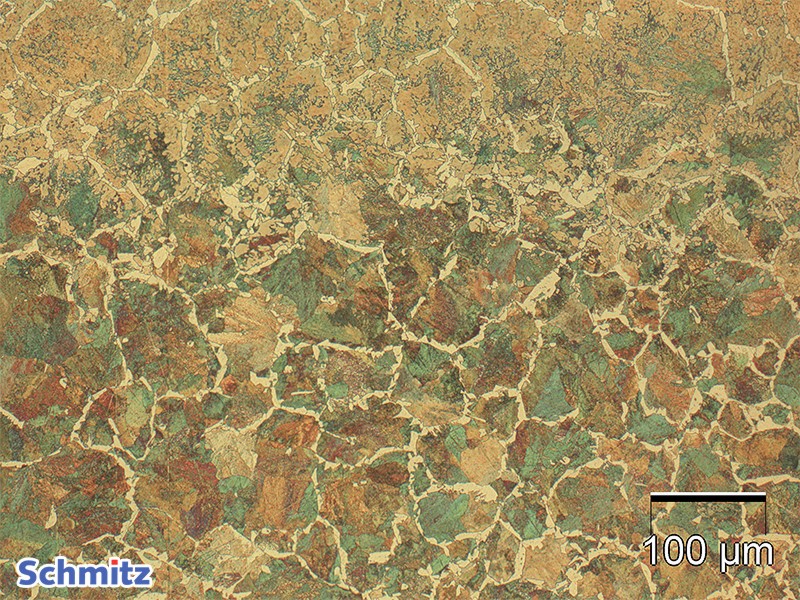
An induction-hardened surface layer still has free ferrite. The energy input through the coil was too low and/or the carbon content range of the material was not further limited, which can become problematic during induction hardening. Our suggestion for a remedy: The purchaser better obtains a stuff with additional symbol +H after the material short designation.
Application example: Grain size determination according to ASTM E112-13
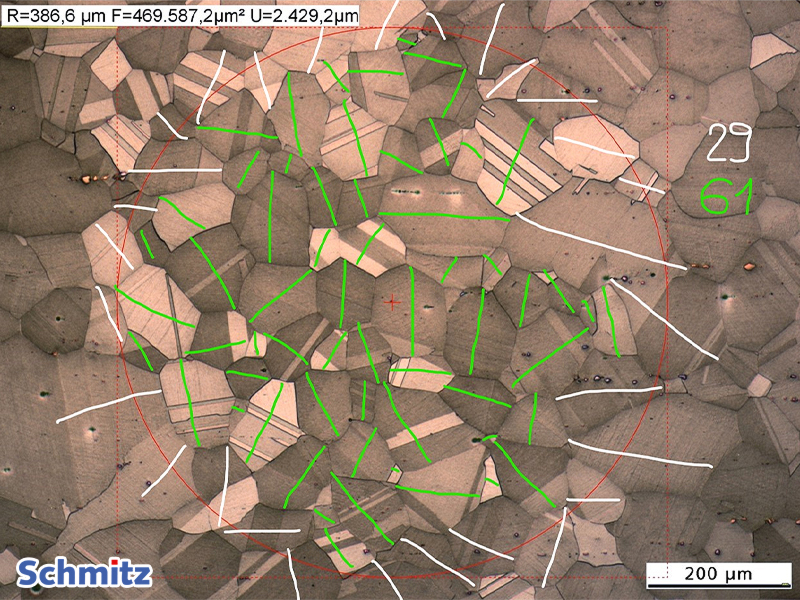
Here, grain size determination was performed on an Inconel 718 sample (etched with semi-concentrated HCl and H2O2).
The average number of grains per mm2 was 161, resulting in a grain size number G of 4.4.
We are also happy to carry out grain size determinations on your samples according to other regulations or standards (e.g. DIN EN ISO 643 or internal company regulations).
Application example: Investigation of corrosion damage
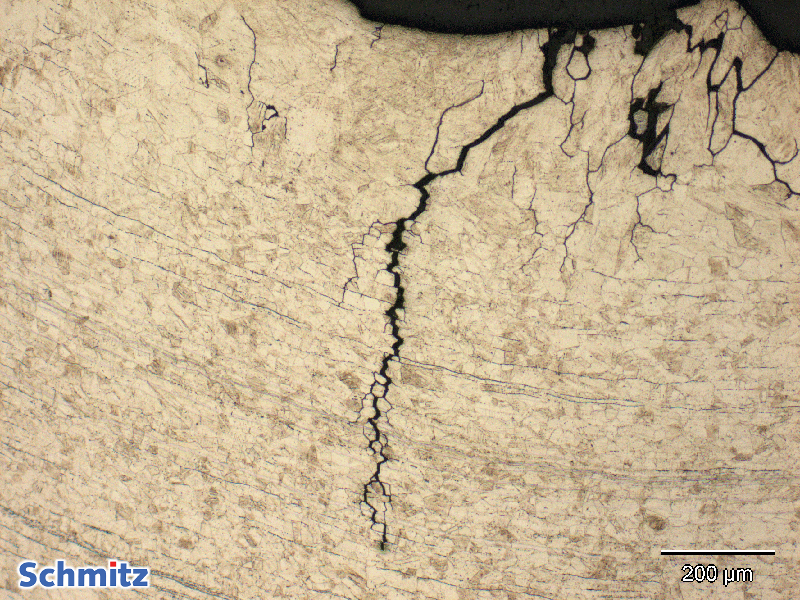
With the aid of metallographic microsection, corrosion mechanisms can often be characterized in detail. This example shows an attack by intergranular stress corrosion cracking.
Quantitative evaluations of corrosion damage, e.g. measuring the depth of corrosion damage (such as in pitting corrosion) or the length of cracks, are also possible.
Application example: Die-cast structure of aluminum
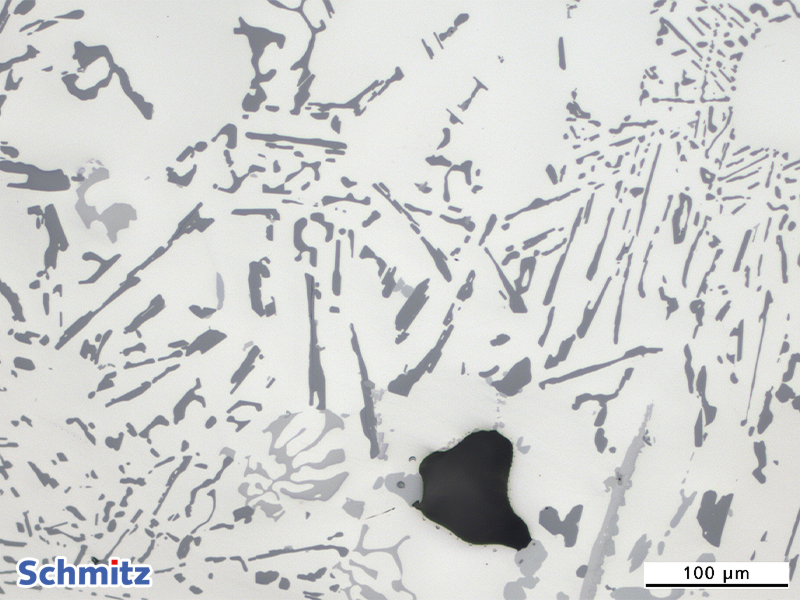
In this metallographic analysis of a die-cast aluminum component, it was found that the refinement by molding in the silicon precipitates is not present here. The silicon crystals are not small and spherical, but large and needle-shaped. In this form, they have an embrittling effect and initiate premature component failure.

